As part of Monday Night Nitrates, our new weekly photograph series, the Chicago History Museum collections staff is blogging about the process of digitizing approximately 35,000 nitrate negatives. In this post, former CHM photographer Joseph Aaron Campbell writes about the painstaking task of converting analog negatives to digital images.
The task of digitizing this nitrate collection came with a unique set of challenges. To start, the time limit of the Institute of Museum and Library Services grant that funded this project allowed for nine months of photography, and the negatives came in a multitude of formats, shapes, sizes, and conditions. Thus, to work efficiently as possible, we used a common photography method known as “rapid capture,” which prioritizes efficiency and speed over other photographic concerns.
The most important pieces of any rapid capture system are the camera system, light source, and software, as those components will ensure that specific imaging standards will be met. Pictured below is the full setup with (1) a laptop running Capture One Pro 9 software, which is tethered to (2) a high-resolution DSLR camera via USB cable. The camera is mounted on a motorized camera stand looking down at the (3) calibrated LED light box. Additionally, behind the camera is a large fume hood that removed any noxious fumes released by decaying nitrate negatives.

The rapid capture system setup in CHM’s Photography Lab. An improvised reel mount can be seen in the lower right corner. All images by CHM staff
To begin, I would first place a negative between two pieces of anti-Newton ring glass, which kept curled negatives flat and prevented Newton rings from forming in the digital image. Next, I positioned it on the LED lightbox, raised or lowered the camera using the motorized camera stand to match the negative size, focused the camera, and produced a digital image using the laptop. For each image, the software would generate an appropriate image ID that would match rights and reproductions data if done properly. Repeat this process 35,000 times and you will have completed digitization!
One major hurdle was when negatives were extremely curled or brittle, such as some 35mm rolled negatives that were uncut and had been tightly wound for years. There was no existing handling or mount solution, so I used K’NEX to build custom reel mounts to hold the negatives rolls during photography. This was approved by conservation staff and worked incredibly well.
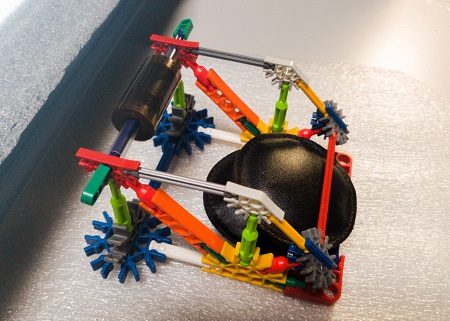
A mount made of K’NEX holds a spool of film.
Once a batch of negatives was digitized, each digital image would be prepared to be archived but also used as a source for a production-ready derivative used for web and print. Examples of what archived images (left) and production copies (right) look like is below:
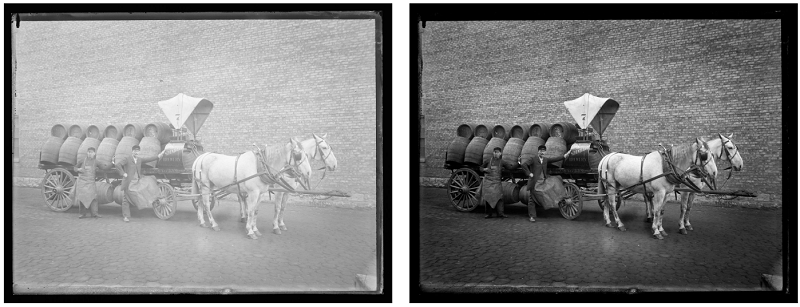
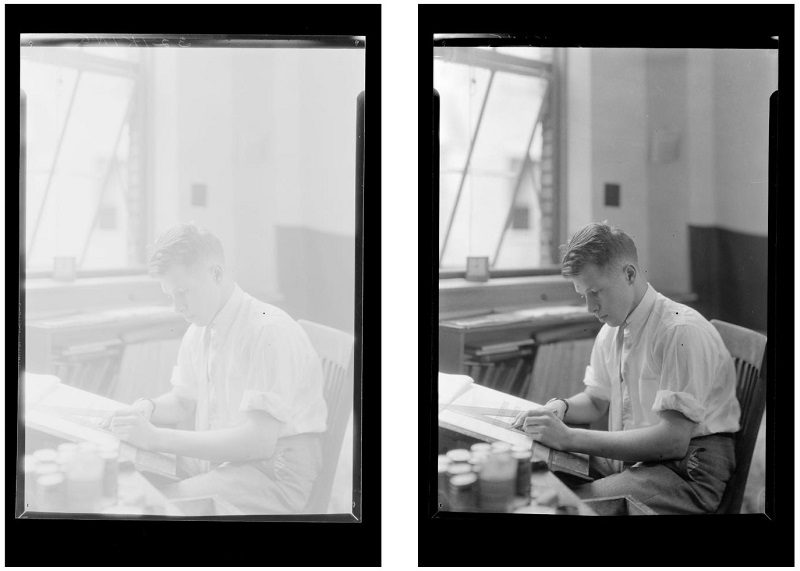
Top: A horse-drawn wagon for Standard Brewery, c. 1900, ICHi-72592, Chicago neighborhoods glass negative collection. Bottom: Ernie King, December 1932, ICHi-151106, Raymond W. Trowbridge negatives collection.
Another challenge was that there just wasn’t enough time to produce photography and edit each individual image. I turned to my limited coding background and created an automated tonal adjustment script. This part of the workflow is what makes this rapid capture system unique.
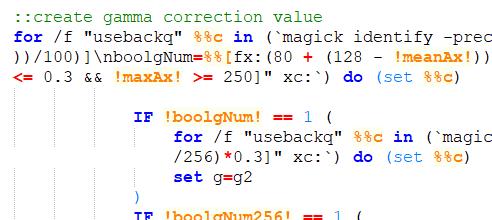
As the code runs, it reads a source image to analyze that image’s unique histogram and various attributes, then uses the additional logic I created to apply adjustments specific to that image before outputting a final production copy and moving on to the next image.
The simultaneous coordination of myself and this code allowed me to photograph a new image batch while finalizing the previous one. Without this, I would not have completed the photography for this project.
Once my role was complete, the digital images would be archived to a server and the physical negatives would be returned to rights and reproductions.
Additional Resources
- Learn more about the code, digitization workflow, and more
- Read all of the blog posts about Monday Night Nitrates